
Creating Comment and Group Presets in Script Canvas
You can save custom node comment and node group settings as presets that you can conveniently reuse. In a team setting, these presets can help you create your own coloring and naming conventions to improve clarity and consistency among Script Canvas graphs.
Customizing the look of a comment or group
Before you create a preset based on an existing node comment or node group, customize its color and font by setting the Background Color, Group Color, and Font Settings options in Node Inspector.
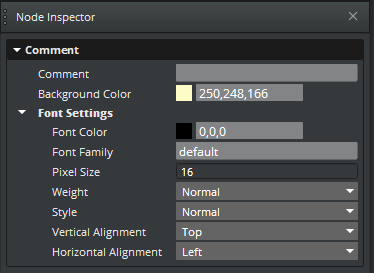
For more information about each setting, refer to Customizing comments and Customizing groups.
Creating and using presets
Create a preset in the Script Canvas Editor by using an existing node group or node comment.
To create a preset from a group or comment
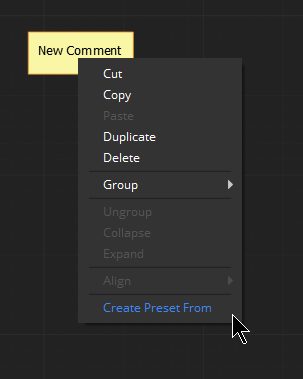
Right-click in the title bar of a group or comment and choose Create Preset From. The preset that you create saves the font settings and color of the original group or comment. It does not save the display text.
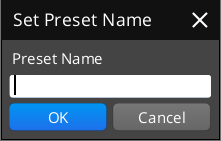
In the Set Preset Name dialog box, enter a name for the preset, and then click OK.
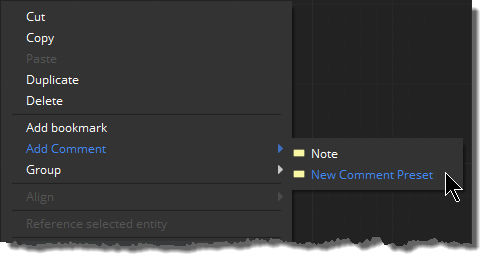
To use the preset that you created, right-click the canvas, choose Add Comment or Group, and then choose the preset comment or group that you created.
Configuring a default preset
You can define a preset as the default for either a node group or a comment. The default group or comment is created when you perform one of the following actions:
- On the Script Canvas Editor toolbar, choose the new comment
 or new group
  icon.
icon. - Press Ctrl+Alt+M to create a comment.
- Press Ctrl+Alt+O to create a group.
To configure a default preset
In the Script Canvas Editor, choose Tools, Presets Editor.
For Construct Type, choose Comment or Node Group.
In the Is Default column, select the preset that you want to make the default, and then choose OK.
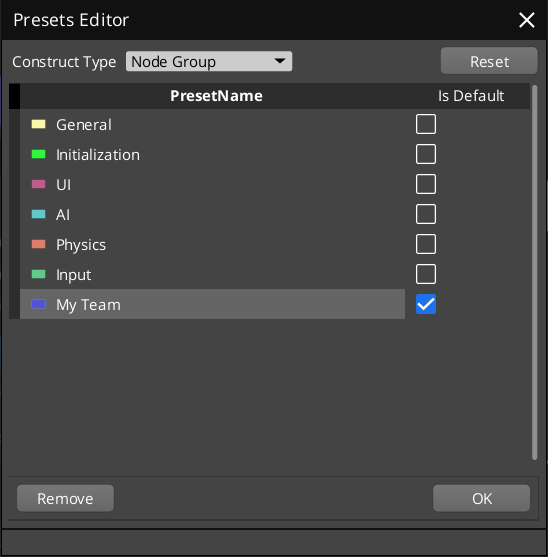
Note:After you configure a preset, you cannot modify it. Use the Presets Editor to remove the preset. Then recreate the preset.
If you recreate a preset, the changes that you make do not propagate to comments or groups that you created with the earlier version of the preset.
Removing a preset
To remove presets, use the Script Canvas Presets Editor.
To remove a preset
In the Script Canvas Editor, choose Tools, Presets Editor.
For Construct Type, choose Comment or Node Group.
Select the preset that you want to delete.
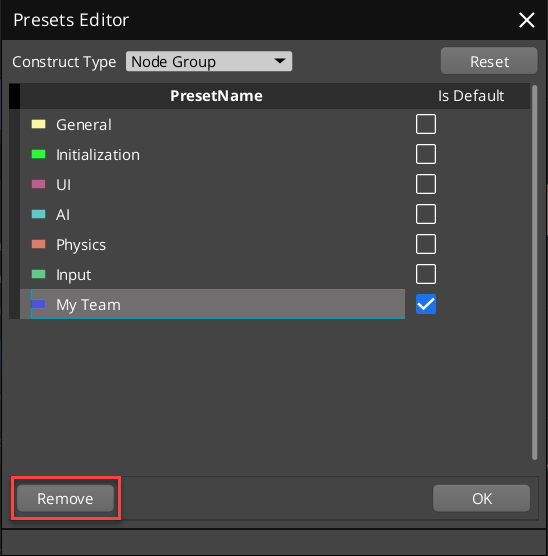
Choose Remove, and then choose OK.